As a code farmer, TianAo's technicians have the habit of saving the historical version of the project, and also need to obtain new files on other machines and edit and submit. Combined with the above requirements, I think of Git. Speaking of Git code hosting services, there is currently a famous GitHub in foreign countries, and there are also platforms such as code cloud and coding in China. Although these platforms have a good experience, but as a tossing emperor, do not know why, just want to use their own group of NAS to toss, build a Git Server server of their own, save the project does not need to upload to other Website services, in a sense, can also protect privacy, so there are the following articles.
The Synology NAS Suite Center is available with the Git Server Suite, as long as it is installed in the Suite Center. But what needs to be noted is:
First, git-related commands need to be connected to the NAS using an SSH client.
Second, you need to use the administrator rights account when configuring git, and the account used by push / fetch is generally a normal user, you must pay attention to the permissions.
1 Configuring the NAS
1.1 Installing the Git Server Suite
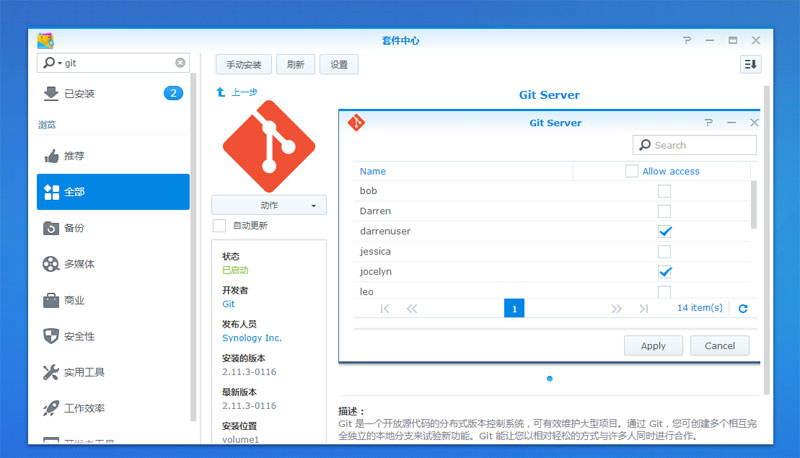
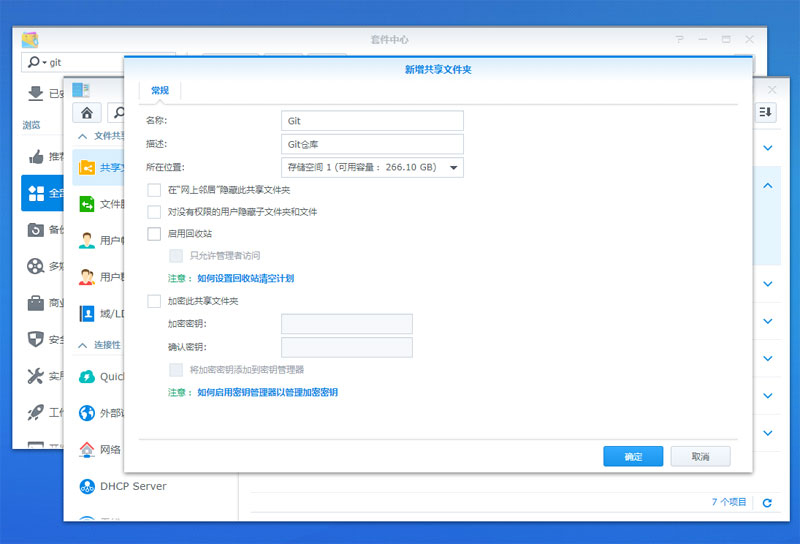
1.2 Create a shared directory to store git repositories
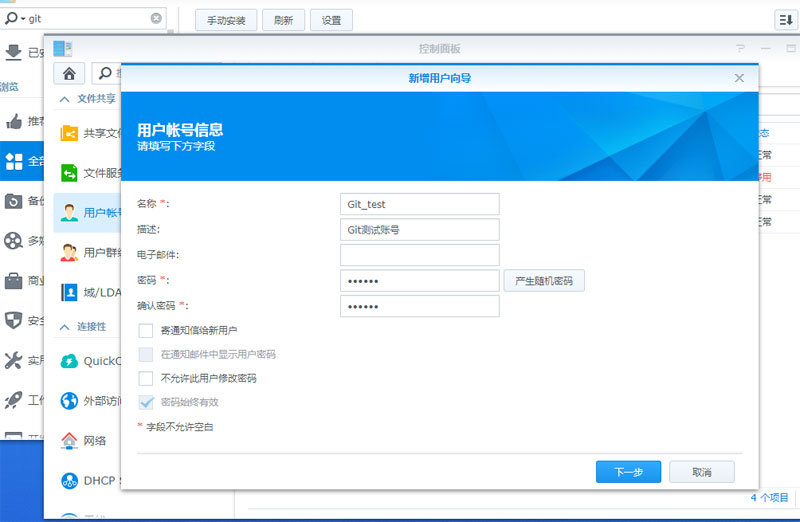
1.3 Create a normal privileged account to use Git
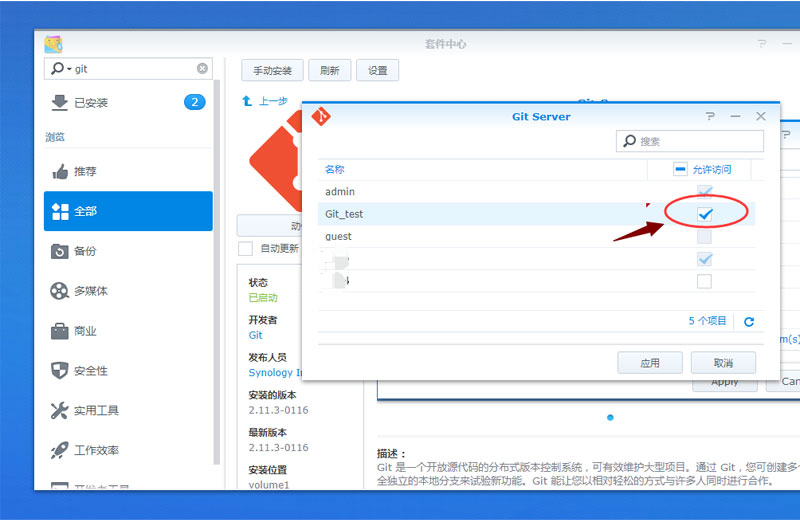
1.4 Set up Git Server and give Git_test users access to Git Server.
1.5 Open the NAS home directory and allow SSH connection
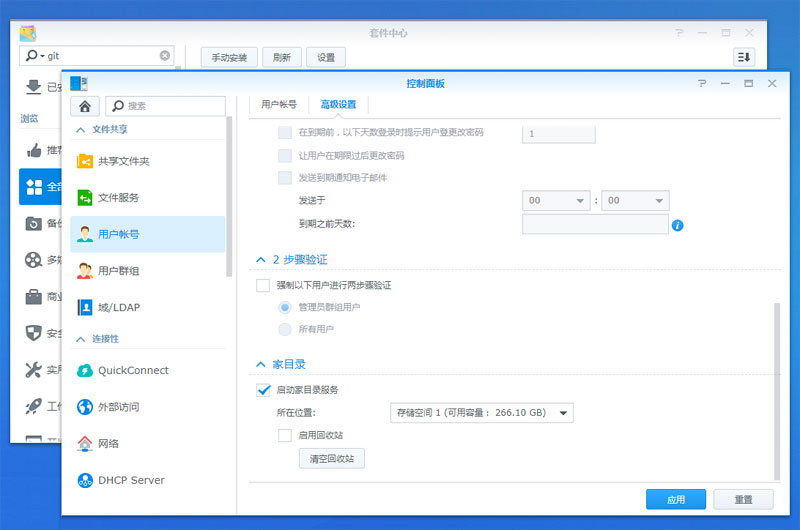
Note: Please open NAS Console→Control Panel→User Account→Advanced Settings→Home Directory to enable home directory service.
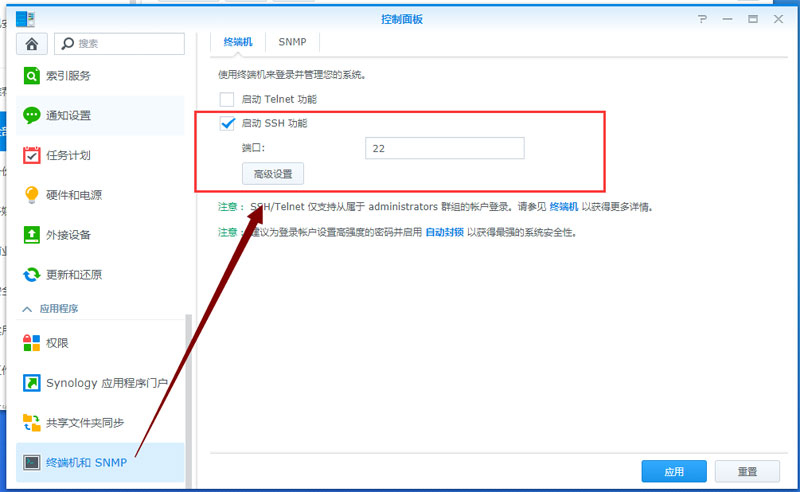
Then open the NAS console → Control Panel → Terminal and SNMP-Terminal to enable SSH.
2 Create a Git repository via SSH
The following operations mainly use the SSH tool to link to the Synology NAS operation. The SSH tool takes Xshell as an example. At the same time, it should be noted that the SSH login account must have administrator rights. The following screenshots only retain key steps.
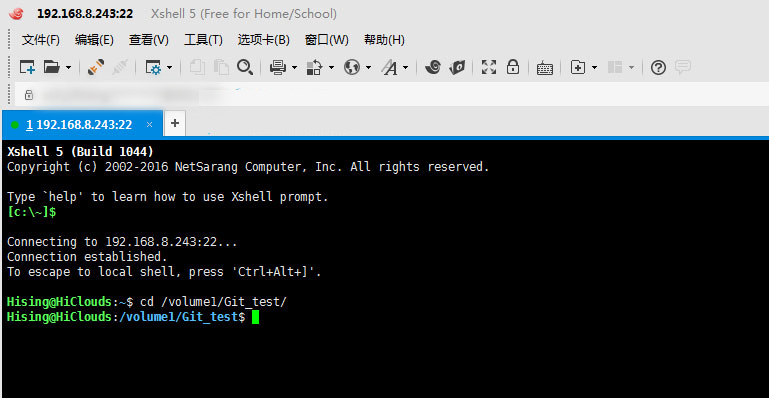
2.1 Log in to the NAS using Xshell and enter the Git_test directory.
Cd /volume1/Git_test/
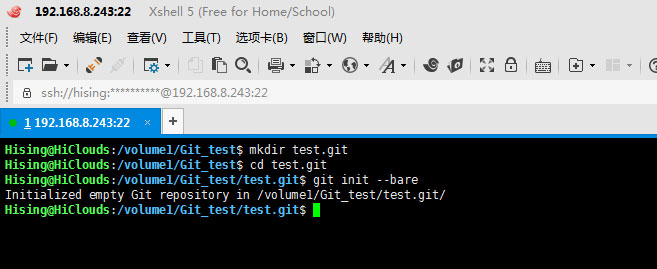
2.2 Create a repository directory, initialize the git repository
Mkdir test.gitcd test.gitgit init --bare
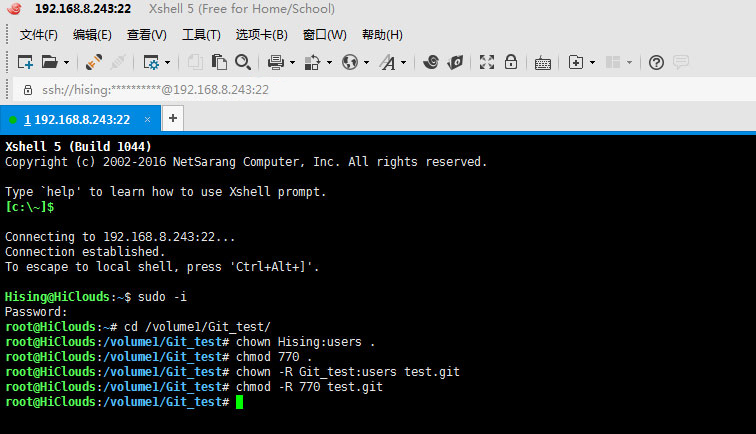
2.3 Set Git directory permissions and give Git_test user access
#Please note that the following commands are recommended to be hand-written, and the content after // is the comment content, no need to input
Sudo -i // Get root privileges
Cd /volume1/Git_test/chown xxx:users . // Change the owner of the Git_test directory to the administrator account xxx (xxx is an account with administrator privileges), and the group to which the directory belongs is changed to users. Be careful not to forget [.]
Chmod 770 . // Change the permissions of the owner and group of the Git_test directory to read/write/run
Chown -R Git_test:users test.git // Change the owner of the test.git directory and all include files and subdirectories
Chmod -R 770 test.git // Change the test.git directory and all permissions containing files and subdirectories
3 Start using your own Git Server server
Note: The following operations require the Git program to be installed locally. Those who do not have the installation can access the installation by going to https://git-for-windows.github.io/.
3.1 Get the warehouse
After installing the Git program, we only need to open the CMD command window and enter the following command to get the Git repository:
Git clone ssh://Git_test@192.168.8.243/volume1/Git_test/test.git
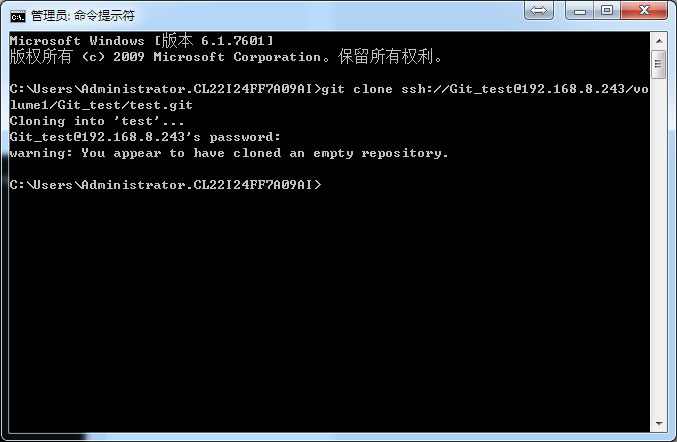
▲The picture shows that the test.git was successfully obtained.
3.2 add the file and push it to the repository
Git add .git commit -m "add test.txt file"git push
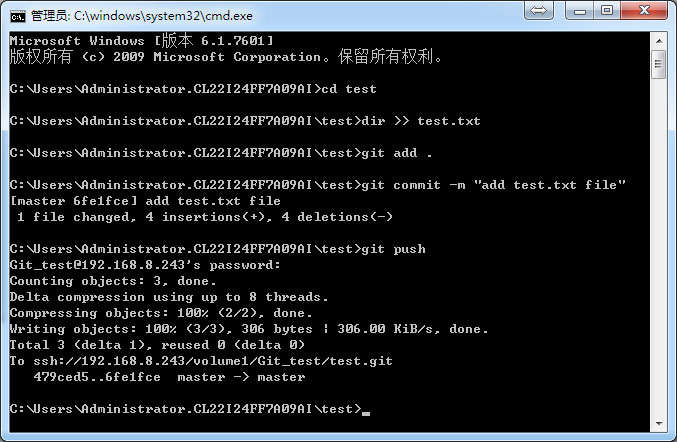
▲The picture is successful to successfully create a file and push to the warehouse
In the process of using, we do not have to use the CMD command line window to operate Git. Generally, the IDE development tools we use are integrated with the Git function, which is very convenient for Git operations. If you need an external network to access Git Server, we need to perform port mapping on the SSH port of the NAS.
